Planner: Student
Introduction
These instructions by DCU Teaching Enhancement Unit are licensed under Creative Commons Attribution 4.0 International.
Using Planner
Planner can help you get organised for an Assignment or Quiz by breaking down the steps involved in completing it and providing interim milestones/deadlines to scaffold your approach to it. This can help with time management and stress reduction.
- From your Moodle course page, choose the Planner to open it
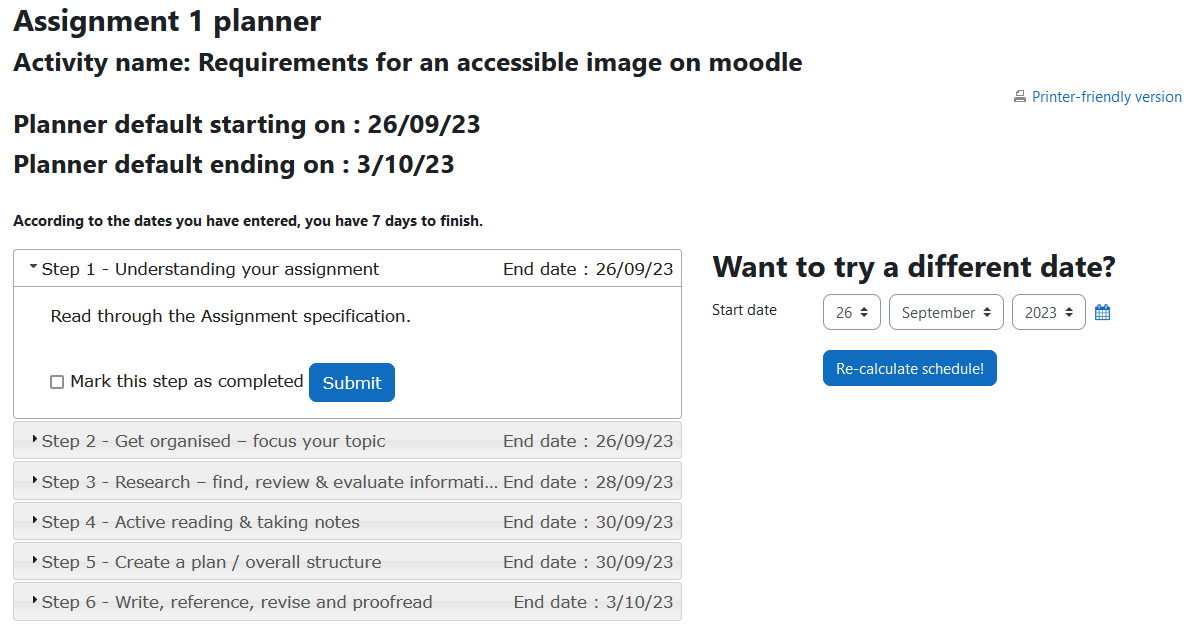
- The steps your teacher has configured appear in an expandable/collapsible accordion, with the step suggest for the current point of time actively displayed – click each step heading to expand/collapse it and see what guidance your teacher has provided in each one
- Each step heading also includes the suggested end date by which you should complete that step in order to stay on top of your preparation before the final due date
- Additional information on the screen includes the name of the Assignment or Quiz to which the Planner is associated, and the default start date and due date for it
- The screen also displays the number of days remaining until the Assignment/Quiz due date
- If you wish to see what your suggested dates will look like if you start your preparation at a different date to the default start date, use Start date fields under Want to try a different date? And then choose Re-calculate schedule!
- The page refreshes with updated information, including:
- The default start/due dates along with your recalculated start date
- The number of remaining days according to your recalculation
- New end dates for each step according to your recalculation
- As you follow the guidance in each step to prepare for your assessment activity, tick the checkbox next to Mark this step as completed and then choose Submit – this collapses the accordion item and presents the next step as the active, expanded one
Using Calendar to stay on top of Planner dates
Your end dates for Planner steps are automatically added to your Moodle Calendar as events in order to help you stay on top of things. Should you choose to re-calculate the end date for your steps in a Planner, the Calendar events are subsequently updated.
- Select the down carat next to your name in the top right corner of Moodle
- Choose Calendar
- Browse through the month to locate the events for Planner
- Select an event to open up a modal window with its details, including date, step name and a link to the course where the Planner is located
- Choose the View link to go to the Planner activity