Referendum: Teacher
Introduction
This involves creating and configuring a referendum activity for an upcoming referendum. This activity provides easy configuration of the proposed issue, start date and end date.
Additionally, you can immediately view the results of the voting once the referendum closes.
Creating a Referendum activity
To create a referendum activity:
- Go to a course.
- Enable Edit mode.
- Click Add an activity or resource.
- Click the Referendum activity.
- Type in the referendum name.
- Type in the referendum description.
- Please note: this description outlines the proposed question, or statement, that students will vote either Yes or No on, so it is an essential element of the referendum.
- Configure the Open date.
- Configure the Close date.
- Click the Save and return to course button.
Viewing Referendum results
To access the “Results report” page:
- Go to a course.
- Click the referendum activity.
- Click the Reports tab.
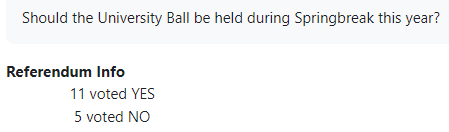
The “Results report” page: Referendum info – The total yes and no votes.
The referendum information page displays:
- Voted YES – The total yes votes.
- Voted NO – The total no votes.