Usertour Uploader: Site administrator
Introduction
This Usertour Uploader tool provides the ability to import usertours easily in bulk. Otherwise, each usertour would need to be uploaded individually via the existing Moodle user tours interface. This tool includes a collection of popular and useful usertours, some community, and some custom.
It will show a list of the available usertours for importing, in which you can see whether they have already been imported or not. Once imported, these user tours are then stored and manageable as normal from the core Moodle user tours interface.
Furthermore, if an institution has a number of their own usertours, they can upload these same JSON files into the plugin’s /usertours/ folder, so they can also be imported via this interface.
Administration
This section is for the administration of the Usertour Uploader tool.
Version Support
This plugin is supported for Moodle versions 3.9, 3.11, 4.0, 4.1, 4.2, 4.3, 4.4, and 4.5.
Deployment
To install the Usertour Uploader tool (tool_bfusertour):
- Unzip and copy the bfusertour folder into Moodle’s admin/tool/ folder.
- Go to Site administration > Notifications to install the tool.
Further installation instructions can be found on the Installing plugins Moodle documentation page.
Capabilities
| Capability name | Manager |
|---|---|
| tool/bfusertour:tour: Able to access the user tour importer | Allow |
View capability
The capability “tool/bfusertour:tour” allows users with the relevant permissions for that context to view the Usertour Uploader tool.
This capability is granted by default to these following archetype roles, using system context:
- Manager
Copyright and funding
This plugin has been developed, maintained, copyrighted, and funded by Brickfield Education Labs.
Usage as Site administrator
This involves importing user tours individually or in bulk through the usertours importer interface. After the user tours have been imported, they can be managed as usual.
Import user tours
To access the “Brickfield User Tours” page:
- Go to site administration.
- Click the Appearance tab.
- Click the Brickfield User Tours link.
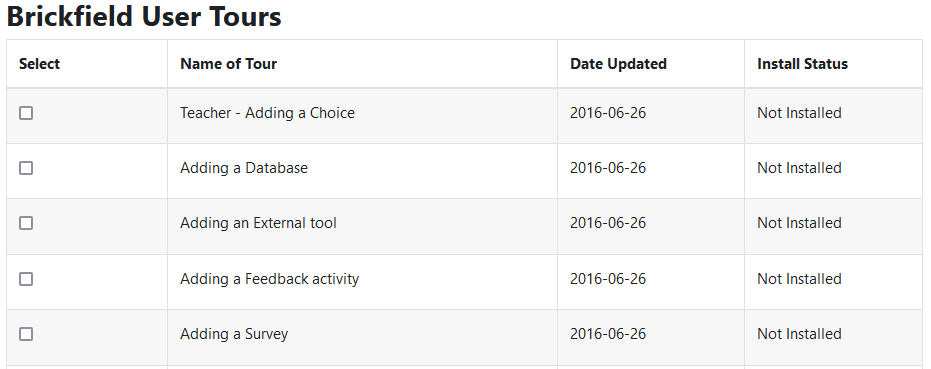
The “Brickfield User Tours” page displays:
- User Tours – the user tours table.
- Import Selected User Tours – the button to import selected user tours.
The User Tours table displays the following for each user tour:
- Select – the checkbox to select the user tours for importing.
- Name of Tour – the user’s tour name.
- Date Updated – the last date the user tour was updated.
- Install Status – Indicates if the user tour has been installed.
- The bulk import workflow in the bottom row – The checkbox in the final row for selecting all users tours to import in bulk.
Importing an individual user tour
To import an individual user tour:
- Click the checkbox in the user tours row.
- Click the Import Selected User Tours button.
Importing user tours in bulk
To import user tours in bulk:
- Click the Select all checkbox in the final row of the User Tours table.
- Alternatively, click the checkbox in the user tours row for each relevant user tour.
- Click the Import Selected User Tours button.

Available usertours
Course management usertours:
- Adding a Database
- Adding an External tool
- Adding a Feedback activity
- Adding a Survey
- Adding a Book
- Adding a Choice
- Adding a File
- Adding a Folder
- Adding a Forum
- Adding a Glossary
- Adding a Label
- Adding a Lesson
- Adding an Assignment (Advanced)
- Adding an Assignment (Basic)
- Adding a Page
- Adding a Questionnaire
- Adding a Quiz
- Adding a SCORM
- Adding a URL
- Adding a Wiki
- Adding Interactive Content
- Adding a Workshop
Gradebook usertours:
- Grading – Grader report
- Grading – Gradebook History
- Grading – Gradebook settings
- Grading – Marking Guide
- Grading – Overview report
- Grading – Rubrics report
- Grading – Single view report
- Grading – Gradebook User report
