Board: Teacher guide
Introduction
As a teacher, you create and configure Board activities, manage columns and posts during the activity, and export the data afterwards. This guide covers all three stages.
Creating a Board activity
- Go to your course.
- Enable Edit mode.
- Click Add an activity or resource.
- Select Board from the activity list.
Board Settings
Optional template
Available when initially creating a board activity:
- Board template — a dropdown list of available templates.
Templates provide the text for the description, and column headings, for quick deployment.
Background
Set one of the following — not both:
- Background colour — a solid colour for the board canvas.
- Background image — an uploaded image behind the columns.
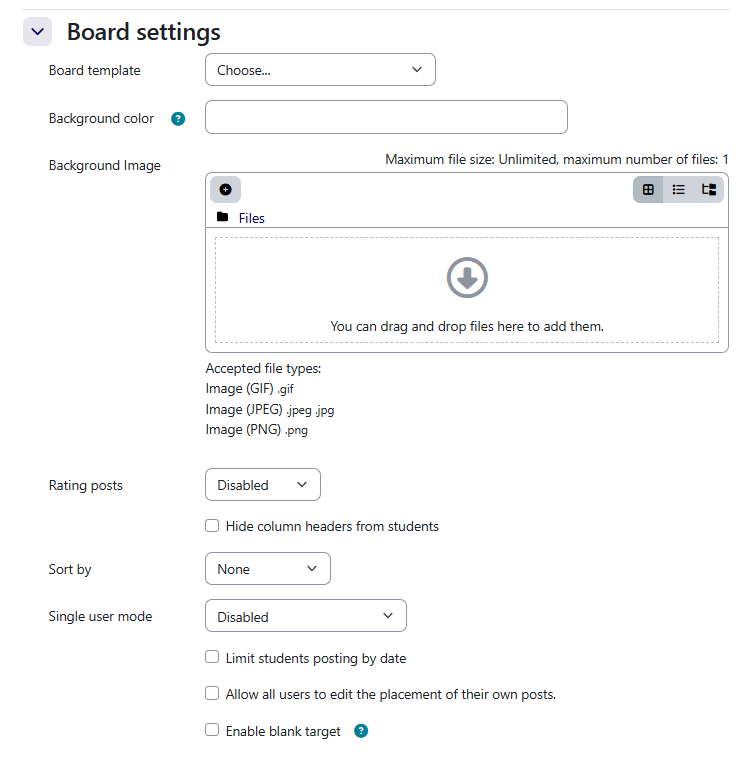
Post and interaction options
- Rating posts — allow or prevent students from liking posts.
- Hide column headers from students — useful when you want the column names to be a reveal element.
- Sort by — allow or prevent students from sorting posts within a column.
- Limit students posting by date — set a closing date for new submissions.
- Allow all users to edit the placement of their own posts — lets students move their posts between columns.
- Enable blank target — when enabled, all links in posts open in a new tab.
- Embed the board into the course page — displays the board inline rather than on a separate page.
Single-user mode
By default, all students share one board. Single-user mode gives each student their own board instance:
- Private — students can only see their own board. Posts are not visible to other students.
- Public — students each have their own board, but can view each other’s. Authorship is visible in this mode.
In either single-user mode, you can view and interact with each student’s board individually. All boards share the same column structure — any column change applies across all student boards.
Click Save and return to course when you are done configuring.
The Board
Open the Board activity to access the board view. From here you can add, rename, move, lock, and delete columns.
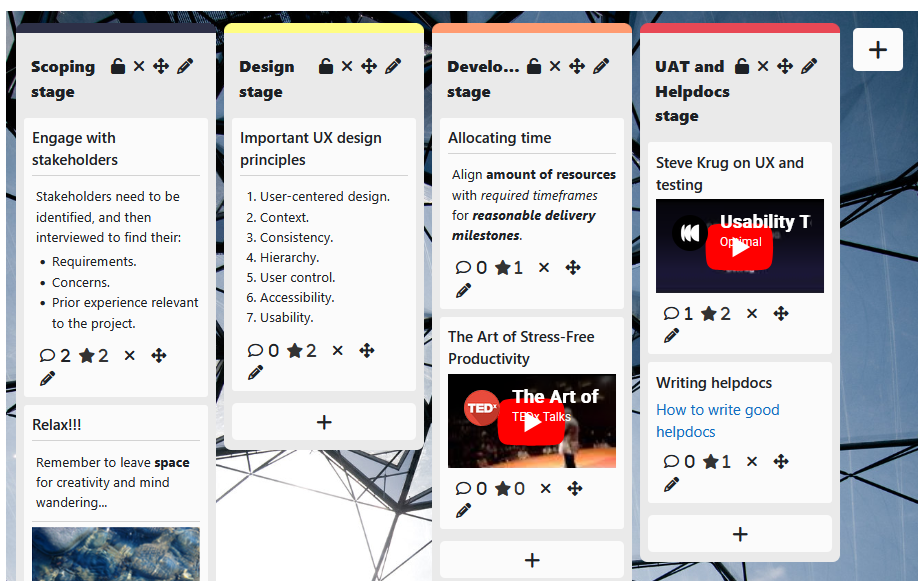
Click the Add new column button on the right. The new column appears with a default name you can change immediately.
Renaming a column
- Click the pencil edit icon to the right of the column heading.
- Type the new name.
- Press Return to save.
Moving a column
Click and hold the four-pronged move icon on the column header, then drag it to its new position.
Locking a column
Locking prevents students from adding new posts to that column. Click the lock button on the column to toggle this on or off.
Deleting a column
- Click the x button on the column.
- Click Delete to confirm.
Managing posts
As a teacher, you can add, edit, move, and delete any post on the board — not just your own.
Adding a post
- Click Add new post to column in the relevant column.
- Enter a post title.
- Enter content.
- Optionally, select a media type (link, image, file, or YouTube) and fill in the details.
- Click Post.
Editing a post
- Click the pencil icon on the post.
- Make your changes.
- Click Post to save.
Moving a post
Click and hold the four-pronged move icon on the post, then drag it to another column.
Deleting a post
- Click the x button on the post.
- Click Delete in the confirmation popup.
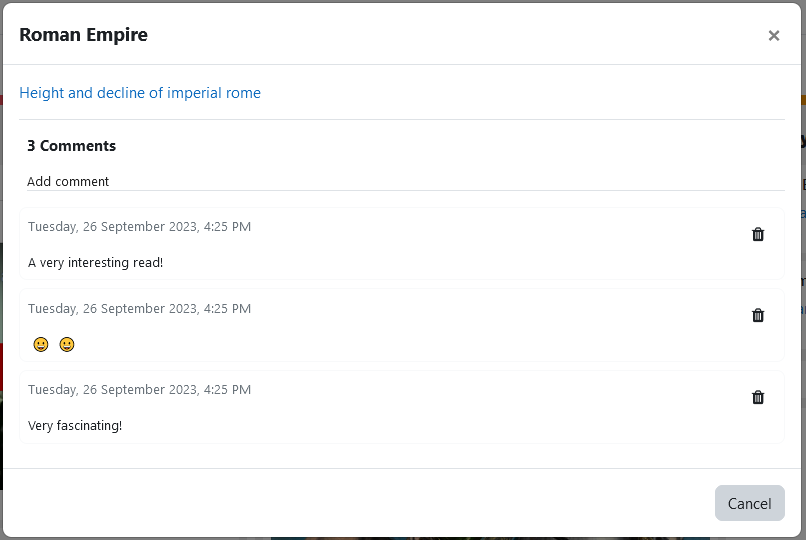
Managing comments
Click the comments icon on any post to see its comments. You can add comments and delete any comment — including those from students.
Adding a comment
- Type your comment into the text area.
- Click Add comment.
Deleting a comment
- Find the comment in the comments section.
- Click the bin icon beside it.
Comment notifications — New
When a student receives a comment on one of their posts, they are automatically notified through Moodle’s notification system. No configuration is required on your part — notifications are sent as soon as a comment is added.
Students control how they receive notifications through their own Moodle profile settings.
Viewing individual student boards
Single-user mode must be enabled in the board settings. When it is, a dropdown menu appears at the top of the board. Select a student’s username to load their board. You can interact with any post on any student’s board.
All student boards share the same column structure. If you add, rename, or delete a column, that change applies to every student’s board.
Exporting Board data
Three separate export sets are available. Open the Board activity — the export tabs appear below the activity description. Available file formats (CSV, Excel, HTML, plain text) depend on what your site administrator has enabled under Manage data formats. Each export can be filtered to include or exclude deleted data.
The three export options are:
- Export Board.
- Export Submissions.
- Export Comments.
Exporting Board
The Export Board tab exports column and post headings, including the number of likes each post received.
- Click the Export Board tab.
- Click Download.
Exporting submissions
The Export Submissions tab exports the full details of each student’s post, including authorship.
- Click the Export Submissions tab.
- Click Download.
Exporting comments
The Export Comments tab exports all comments posted to the board.
- Click the Export Comments tab.
- Click Download.